
Manage your website messaging in Whistle.
Live Chat
Allows for messaging between the property and potential guests through the property website.
Step 1: Install
Step 2: Set Availability
Step 3: Add Email Messaging
Step 4: Set Design
Step 5: Add Action Message
Step 6: Chat with Visitors
Multi-property Brand (Optional)
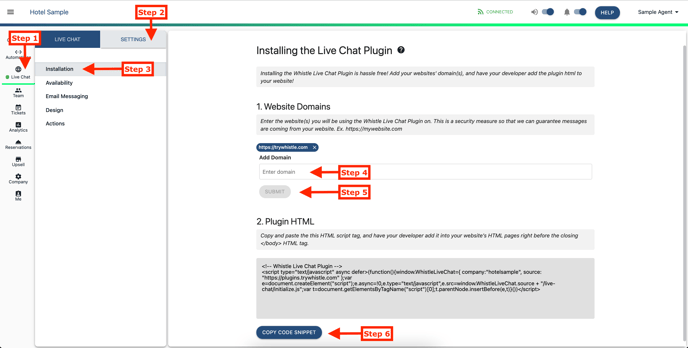
Step 1: Install
- Go to the Live Chat tab inside Whistle
- Select Settings section
- Select Installation section
- Add Domain: Enter the website(s) you will be using the Whistle Live Chat Plugin. This is a security measure so that we can guarantee messages are coming from your website
(Ex. https://mywebsite.com) - Click Submit
- Copy and Paste HTML Script into your website's HTML pages right before the closing HTML tag
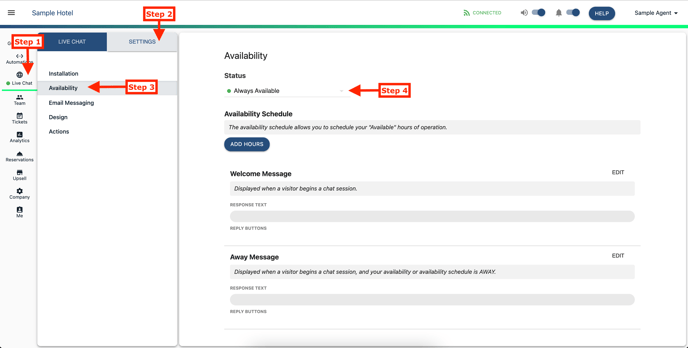
Step 2: Set Availability
Set when your website messaging is available to online visitors.
Set Status
-
Go to the Live Chat tab inside Whistle
- Select Settings section
- Select Available section
- Select availability Status
- Always Available
- Always Away
- Use Availability Schedule - Add Hours
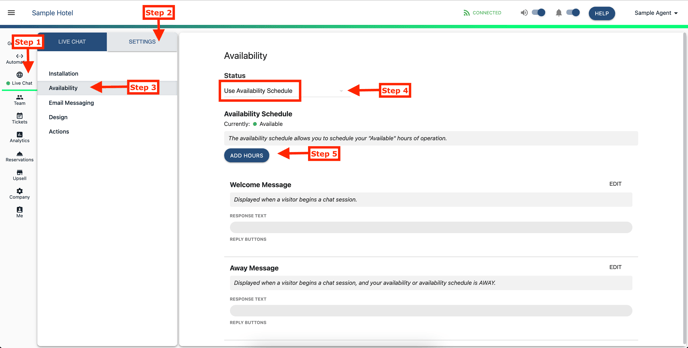
Add Hours
-
Go to the Live Chat tab inside Whistle
- Select Settings section
- Select Available section
- Set Status to Use Availability Schedule
- Add Hours
- Everyday
- Weekdays
- Weekends
- Sunday
- Monday
- Tuesday
- Wednesday
- Thursday
- Friday
- Saturday
Welcome Message - displayed whenever a visitor begins a chat session
-
Go to the Live Chat tab inside Whistle
- Select Settings section
- Select Available section
- Click the Welcome Message section
- Enter Message
- Click Save

Away Message - displayed when a visitor begins a chat session and availability is set to 'Away'
-
Go to the Live Chat tab inside Whistle
- Select Settings section
- Select Available section
- Click the Away Message section
- Enter Message
- Click Save

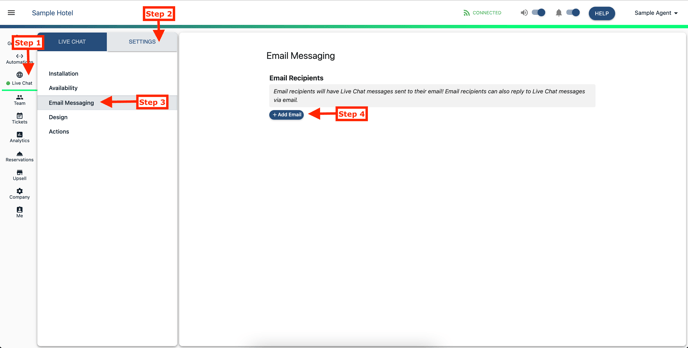
Step 3: Add Email Messaging
Add email recipient(s) to receive an email if a website visitor starts a chat conversation.
- Go to the Live Chat tab inside Whistle
- Select Settings section
- Select Email Messaging section
- Click + Add Email
-
Enter Email Recipient
-
Set Status
-
Click Confirm

Step 4: Set Design
Configure website live chat widget display.
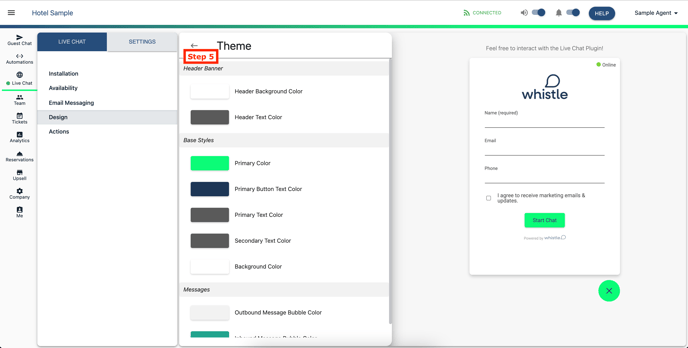
Theme - Select colors
- Go to the Live Chat tab inside Whistle
- Select Settings section
- Select Design section
- Click Theme
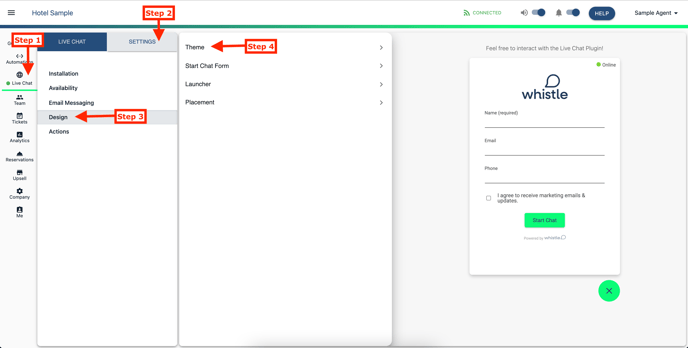
- Select Theme Colors
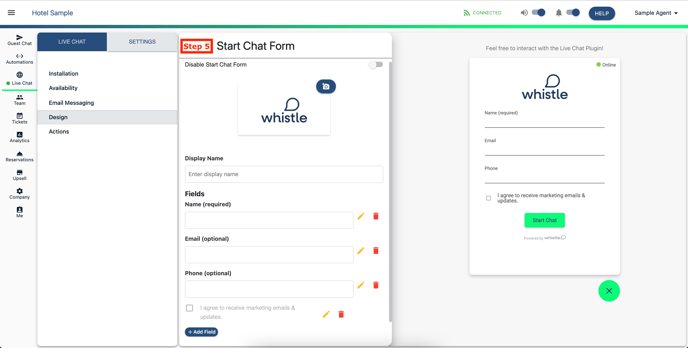
Start Chat Form - Upload logo and set labels for a website visitor to complete in order to begin a chat
- Go to the Live Chat tab inside Whistle
- Select Settings section
- Select Design section
- Click Start Chat Form
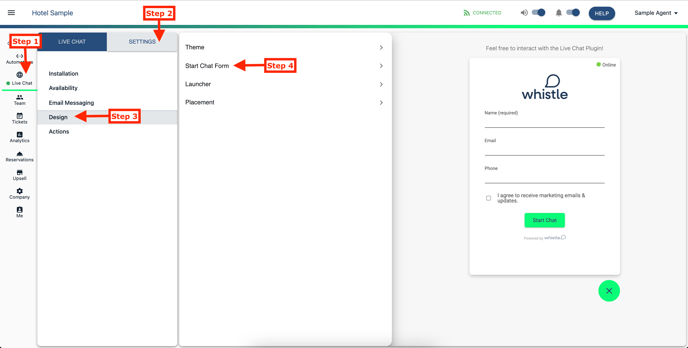
- Update Form Information
- Disable Start Chat Form
- Display Name
- Fields
- Text
- Marketing Consent Checkbox
Launcher - Specify a HTML button ID that opens the live chat widget, by default a button is provided
- Go to the Live Chat tab inside Whistle
- Select Settings section
- Select Design section
- Click Launcher
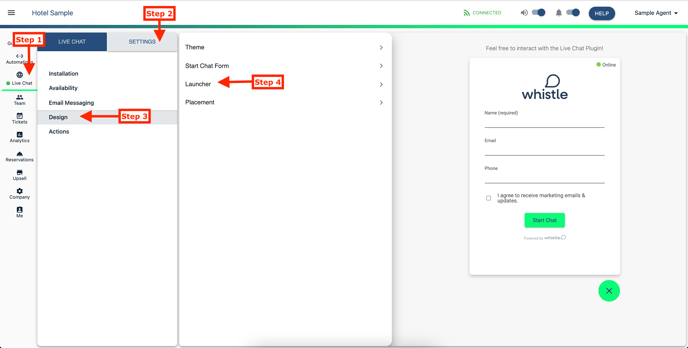
- Enable External Launcher Button
- Add External Element ID

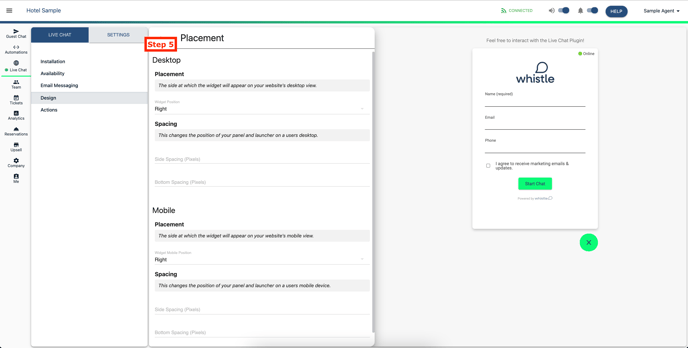
Placement - Set location of widget
- Go to the Live Chat tab inside Whistle
- Select Settings section
- Select Design section
- Click Placement
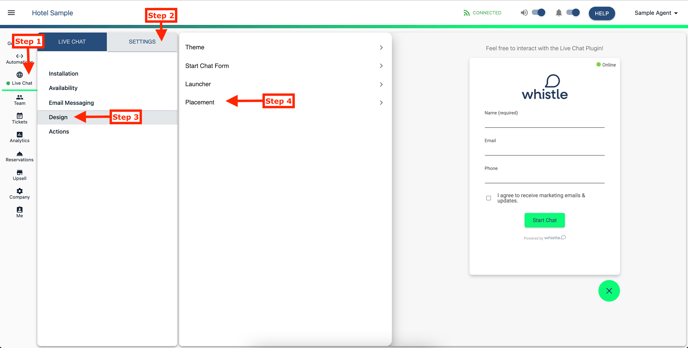
- Update Desktop and Mobile Placement of widget
Step 5: Add Action Message
Add an action message, pop-up text next to chat icon, this encourages a website visitor to start a conversation by messaging in.
- Go to the Live Chat tab inside Whistle
- Select Settings section
- Select Actions section
- Enter Message to be displayed
- Click Save Action

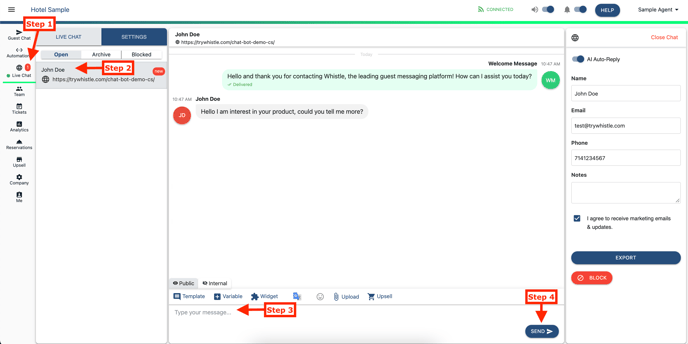
Step 6: Chat with Visitors
- Go to the Live Chat tab inside Whistle
- Select Guest message
- Type your message
- Click Send
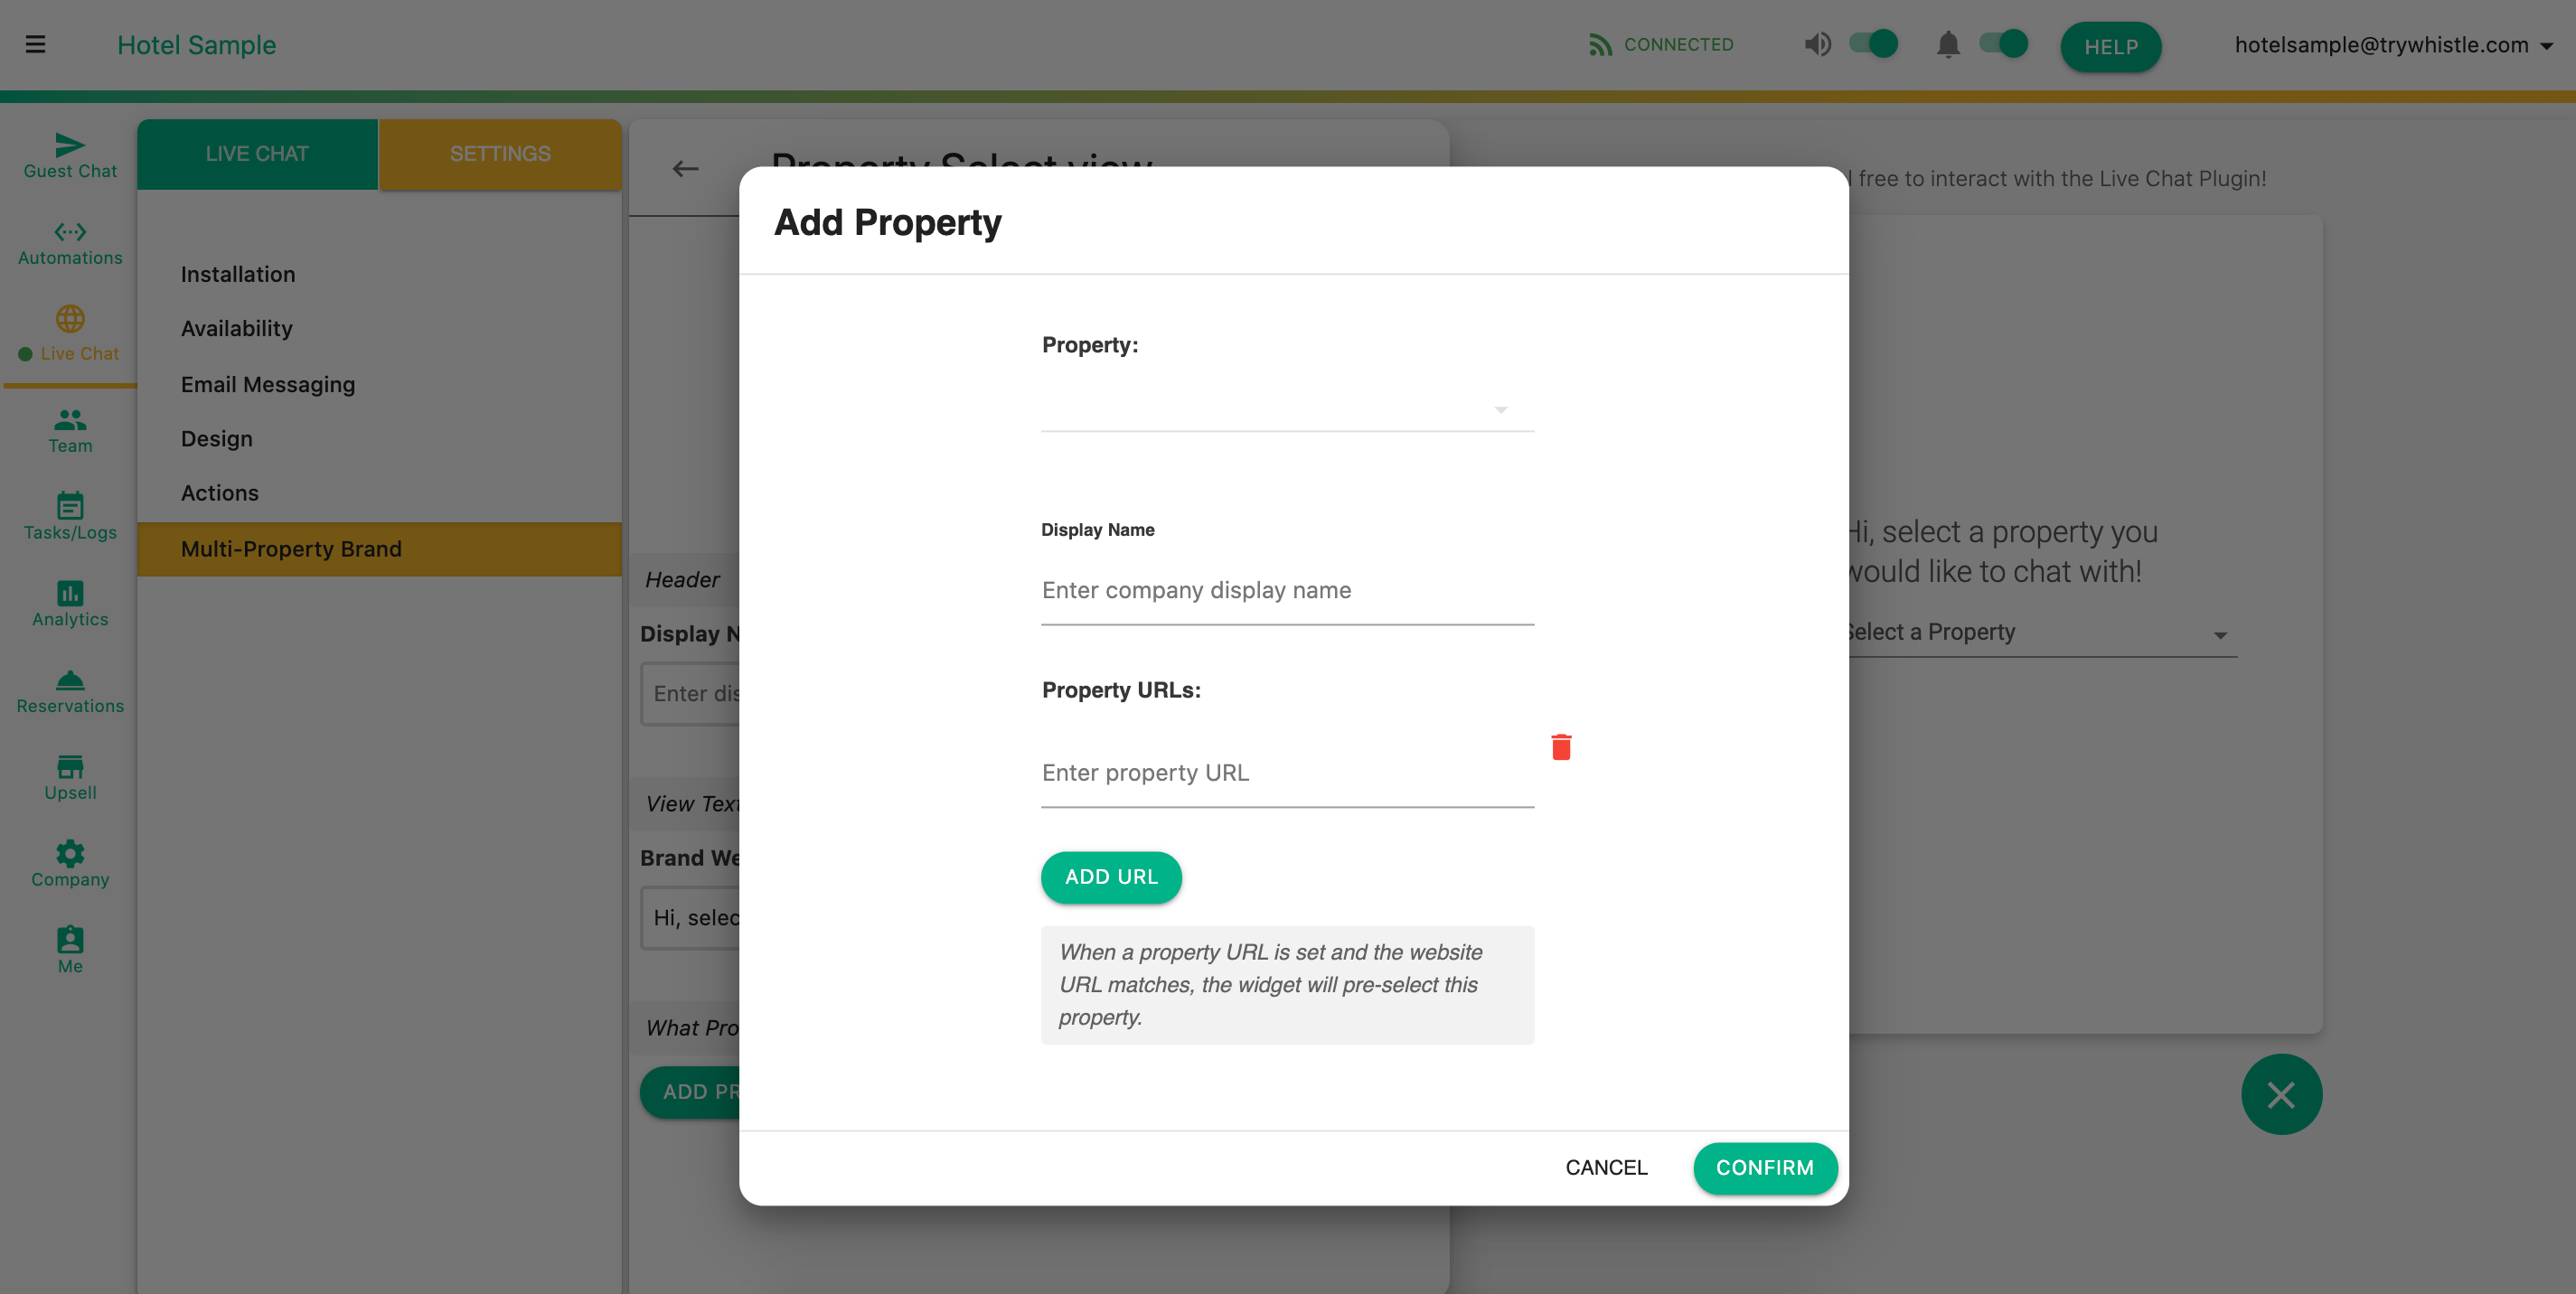
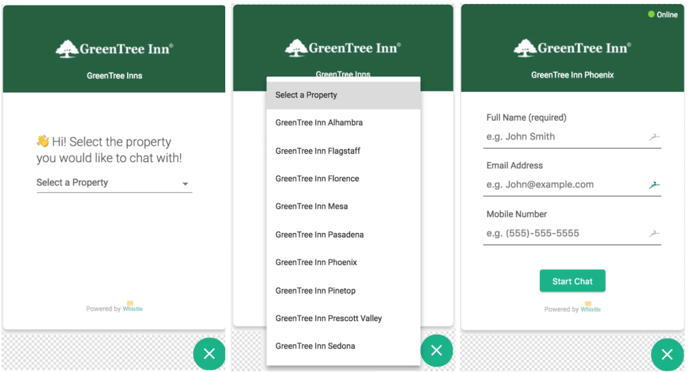
Multi-property Brand
Available for platforms that operate multiple properties (brand/group). Website visitors will have the option to select which platform/property to start chat. Location is pre-selected depending on visitors website location (URL).
- Contact Whistle Support, support@trywhistle.com, to activate setup.
Comments
0 comments
Please sign in to leave a comment.